Web Accessible Digital Forms
The university offers support and tutorials on various software and tools to create digital forms.
RamDocs | Hyland Forms | Google Forms
RamDocs
RamDocs, powered by Formstack, offers a robust solution for creating simple forms and approval workflows. This intuitive software goes beyond basic form and survey creation, enabling you to generate standardized documents and streamline your data collection and distribution.
Hyland OnBase Forms
Hyland's OnBase platform automates processes, manages important business content and works with other applications to provide users with a complete view of the right information, where and when they need it.
Learn more about Hyland Forms
Learn more about Hyland OnBase Video Guides
Google Forms
Create Google Forms using a university corporate account instead of a personal work email account to streamline security and data ownership.
Step 1: Open Google Forms
- Go to https://docs.google.com/forms/u/0/?tgif=d
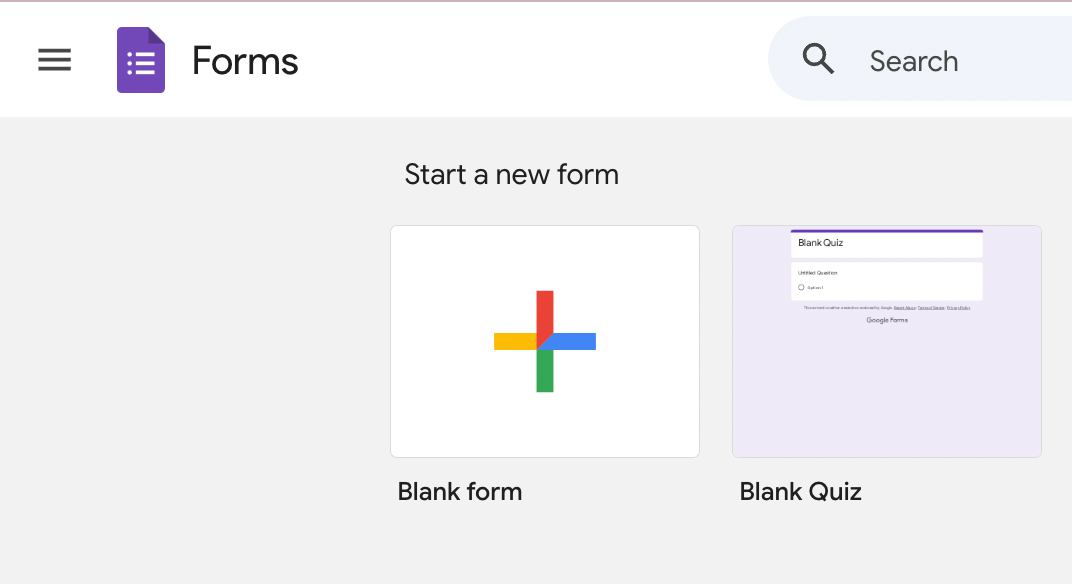
- Sign in with your Google account if prompted.
- Click the “Blank form” button (the plus sign) to start a new form.
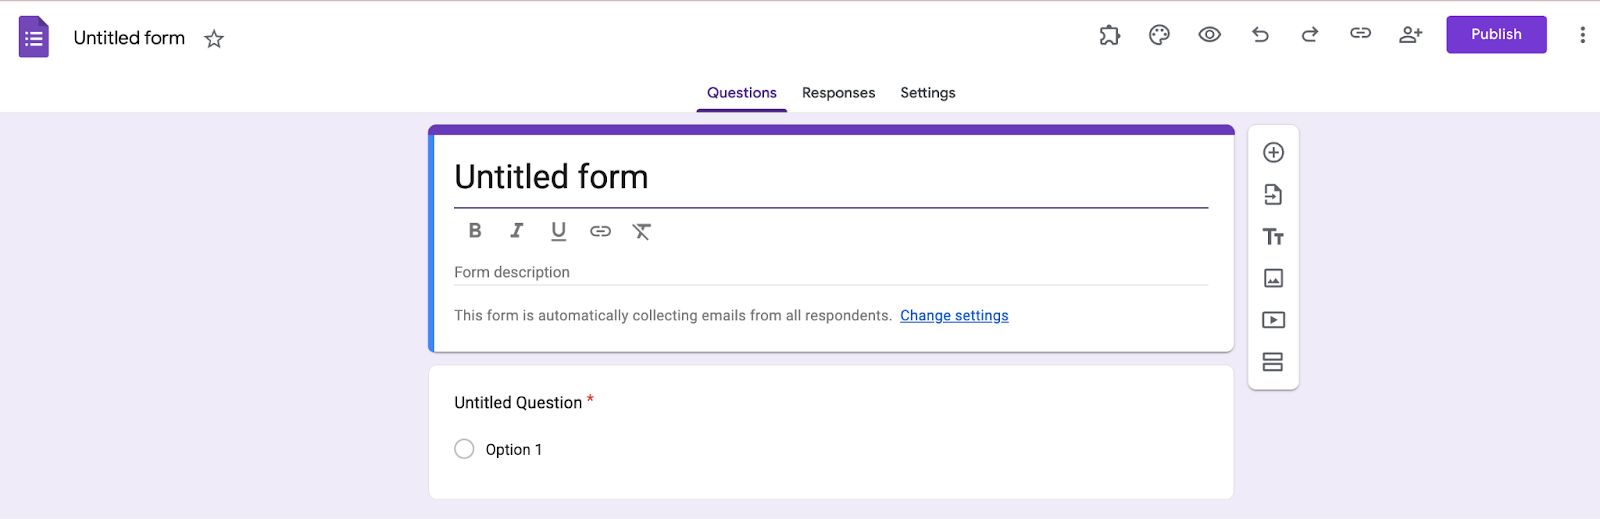
Step 2: Add a Title and Description
- At the top, click “Untitled form.”
- Type the name of your form.
- Click the form description area underneath and add instructions or context for respondents.
Step 3: Create Questions
- In the first question box, type your question.
- Choose a question type from the dropdown on the right:
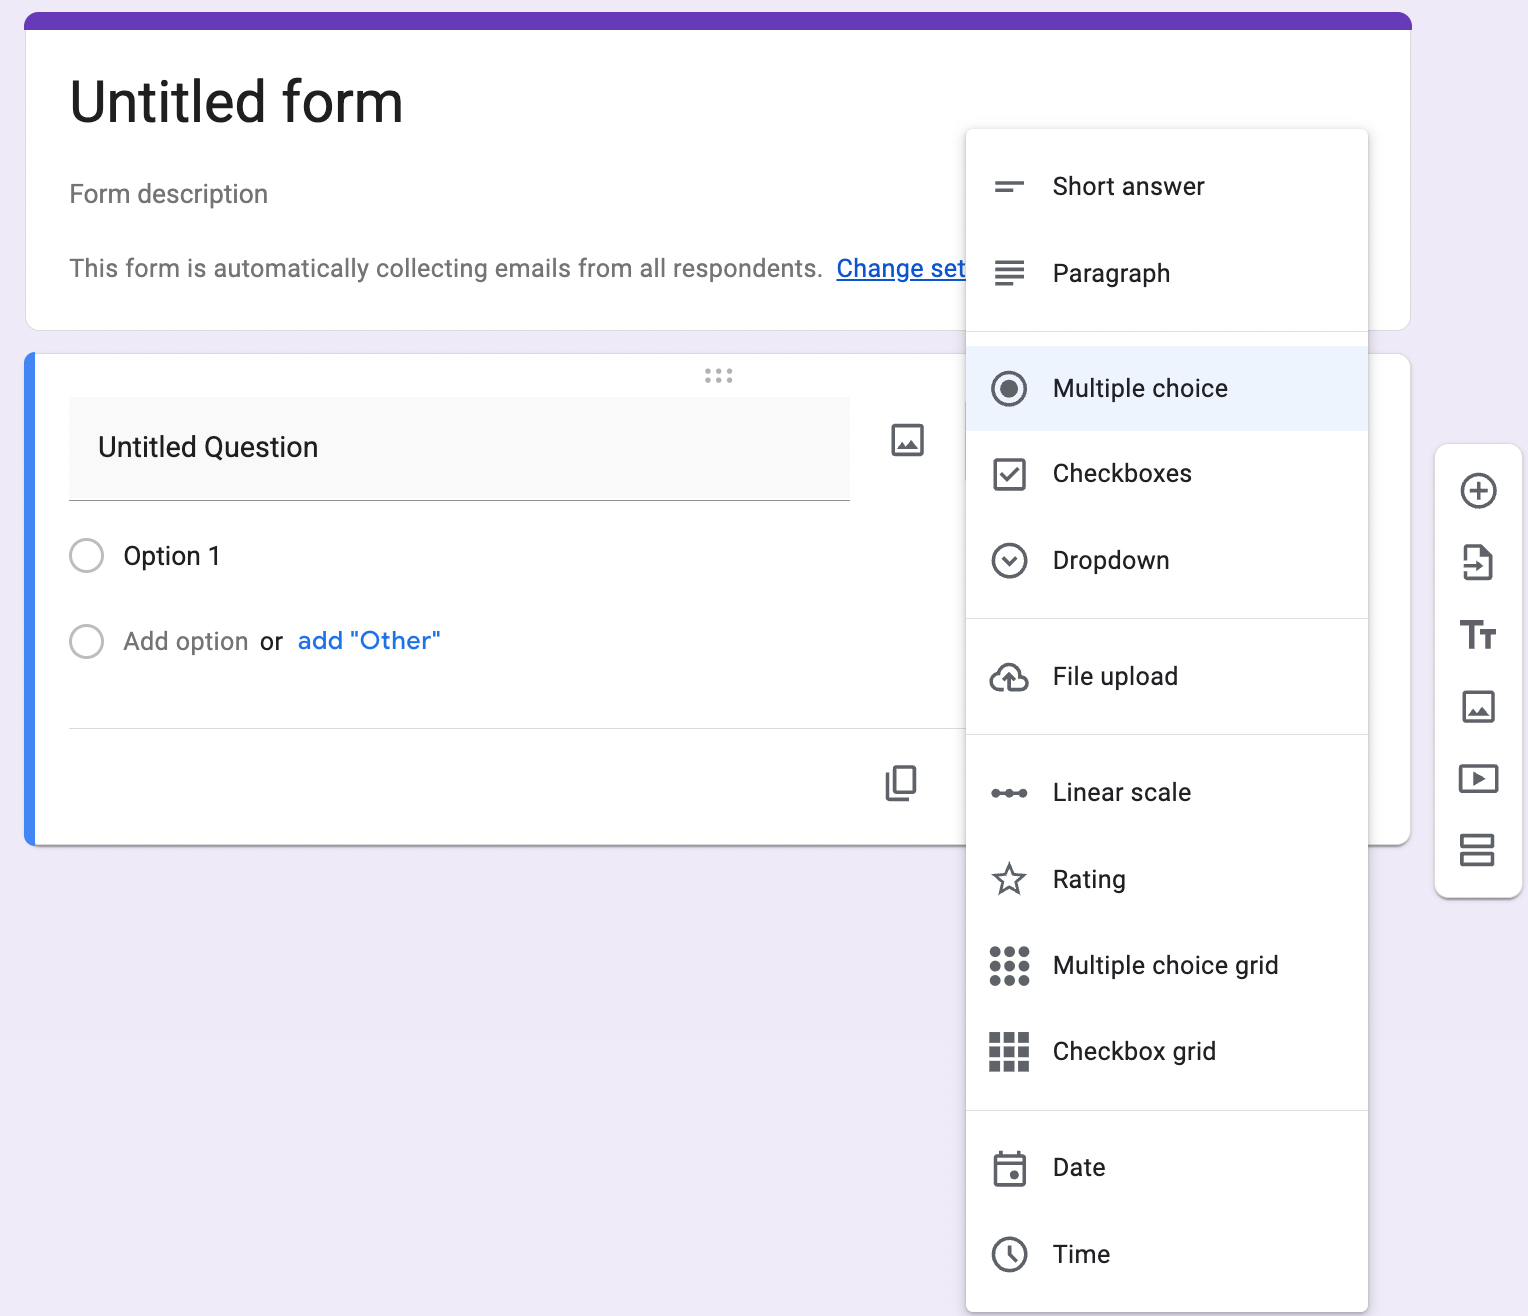
- Multiple choice
- Checkboxes
- Short answer
- Paragraph
- Dropdown, etc.
- Toggle “Required” on if the question must be answered.
To add more questions:
- Click the + (Add question) button on the right toolbar.
Step 4: Customize the Form (Optional)
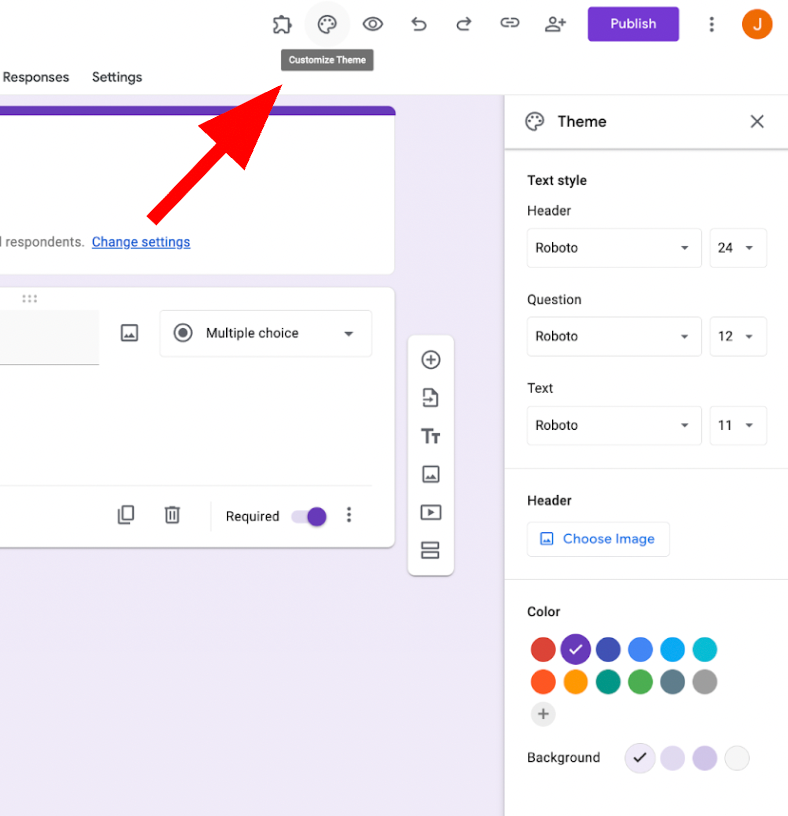
- Click the palette icon at the top to change:
- Theme color
- Background color
- Font style
- Click the image icon to add images or videos.
Step 5: Preview the Form
- Click the eye icon (Preview) in the top-right corner.
- Test the form as a user to ensure everything works.
How to Make the Google Form Private
Option A: Restrict to Specific People
- Click Send in the top-right.
- Click the link icon.
- Before copying, click “Change to anyone with the link.”
- Select Restricted or enter specific email addresses.
- Click Done.
This ensures only chosen people can open the form.
Option B: Limit to Your Organization
- Click Settings (gear icon).
- Under Responses, check:
- “Restrict to users in your organization.”
- “Limit to 1 response.” (optional)
- Click Save.
This allows only Fordham users to respond.
Helpful Tips
- Responses automatically save in Google Forms → Responses tab.
- Click the green Sheets icon to export responses to Google Sheets.
- You can duplicate forms using the three-dot menu.
- Forms auto-save, so no manual saving is needed.
Helpful Resources
-
Use this as the main instructional reference:
- Create a new form in Google Forms
- This guide explains how to start a form, add questions, customize formatting, and preview it before sharing. (Workspace Updates Blog)
-
Helpful if your guide discusses permissions or privacy:
- Choose who can respond to your Google Form
- Google Forms lets you limit responses to specific users or allow anyone with the link, depending on your settings and organization policies. (9to5Google)
-
Useful for distribution instructions:
- Send your form to others to fill out
- This shows how to share via link, email, or embed code, making it easier to collect responses. (Google Sites)