Upload PDFs
In order for a PDF to be uploaded and live on the site, it must be accessible (ADA compliant). When a PDF is uploaded, it will go into Workflow for review.
- If the PDF meets accessibility requirements, it will be approved, and you can add it to your page.
- If the PDF does not meet accessibility requirements, it will be rejected, and you will need to resolve the accessibility issues in the PDF.
The maximum allowed PDF file size is 5 MB. Please ensure all images are compressed and the total file size is under 5 MB before uploading.
Learn More About PDF Accessibility
Migrated PDFs | Upload New PDFs | Link to PDFs
How to Find Migrated PDFs in Terminalfour
In the left column on the main page:
- Click on Content > Media Library: Categorised > Review > Content Assets > PDFs > Jadu Single Folder PDFs
All migrated PDFs will appear in this folder, once they populate you can then search by part of the PDF title.
All PDFs should be uploaded to your area's designated folder.
There are two methods to upload a PDF to Terminalfour.
1) Uploading PDFs directly to the Media Library:
After logging into Terminalfour please go to the left column on the main page:
- Click on Content > Media Library: Categorised > Home > Departments-Centers-Offices > Financial Aid > PDFs (This is an example folder destination. Please upload PDFs to your designated folder.)
- Click on the PDF folder so it is highlighted in blue.
- In the body of the page, click the green ‘Add Media’ button at the top
- Upload the file
- Give it an SEO friendly name
- Fill the Description/Alt Text field (mandatory for ADA compliance)
- Add related keywords
- Click Save.
2) Uploading PDFs through General Content (Body of the Text)
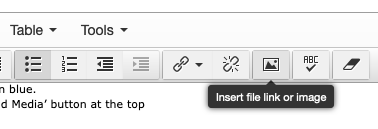
- Click on the "Insert file link or image" icon or click on Insert > Insert file link or image
- On the left-hand side, navigate to the section where the PDF has been uploaded and find the PDF.
- Click on the green "Add Media" button in the upper right
- Click on the Media File field to be prompted to upload your PDF
- Fill the Description/Alt Text field (mandatory for ADA compliance)
- Click the blue Save Changes button in the bottom right
- The PDF will go into Workflow for review (will be put in place)
The maximum allowed PDF file size is 5 MB. Please ensure all images are compressed and the total file size is under 5 MB before uploading. All PDFs must be ADA compliant prior to being uploaded to the system.
Linking to New PDFs/Inserting PDFs into Page
After your PDF has been approved:
- Click on the "Insert file link or image" icon or click on Insert > Insert file link or image
- Find your newly approved PDF, and click on the blue Actions button.
- Choose "Select Media" to create a link to the PDF
- Once the link is in the body of the text, double click on the link in order to rename the PDF link.
- A box will pop up labeled, "Set Media Attitrbutes."
- Under "Name" type the text you wish to the PDF link to display.
- Click "Ok"
- Note: This will not rename the PDF itself but rather it will only rename the displayed text linking to the PDF.
Getting PDF Links

- Within a General Content type please follow the above steps under Linking to New PDFs/Inserting PDFs into Page.
- Click the blue "Save Changes" button in the bottom right. Or the blue arrow next to the button if you have those privileges and click "Save and approve."
- After at LEAST 30 minutes please go to the live site.
- Hover over the PDF link and right click.
- Click on "Copy Link Address"
- Use this link for linking directly to a PDF when required including but not limited to: the Side Bar content type and external links.