Edit Content
Edit content | Save and Approve | Format content | Archive content | re-Publish content | Review content
Editing
Editing a page can be done by doing the following:
- In the Site Structure, click the + sign next to each page name to navigate to the section/page you wish to edit, and click on it
- The + sign expands the section to display the child/subpages
- Clicking directly on the page name takes you to edit mode on the designated page
- Select the "Content" tab
- Select the content type you wish to edit
- Click on the "Save Changes" button at the bottom of the page after you have finished editing
- To Save and Approve updates, you must be a Moderator,
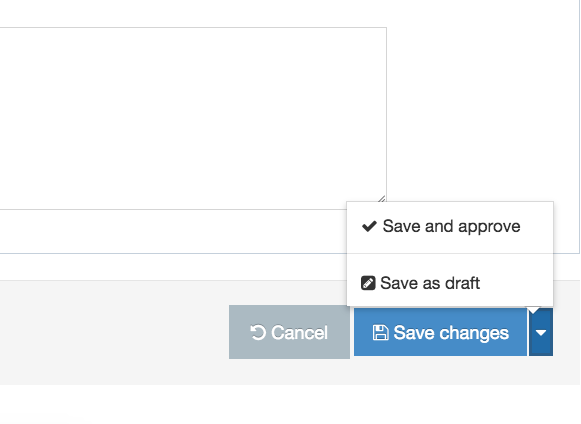
- Click the down arrow next to the blue Save button...and click Save and Approve.
Updates will publish within a half hour but they are immediately visible on the 'preview' link.
- Click the down arrow next to the blue Save button...and click Save and Approve.
- DO NOT click the "Publish" or "Publish Section" button at the top. Once you click "Save and Approve", your updates will publish to the live site within 30 minutes.
Styling
For the Fordham website, we have a CSS Stylesheet in place that defines how each tag will be displayed. Do not use the <font> tag or another styling because it overrides the CSS Stylesheet. This will create issues with ADA compliance.
Formatting
A list of all available formats is available under Format > Formats, and this includes Headings and Buttons.
For Headings, the first heading you must use on a page is Heading 2 <h2> for accessibility best practices. Heading 1 <h1> should never be used because it is meant for the title of your page. Headings must go in chronological order in either direction but you should never skip a tag.
- Heading 2 should denote a section
- Heading 3 should denote a subsection, and so on.
- You should never start your page with a heading level past Heading 2.
- <h2> <h3> <h4>
- <h2> <h2> <h3> <h4>
- <h2> <h2> <h3> <h3> <h4> <h3>
To create a button, go to Format > Formats and select one of the following buttons depending on the desired style:
- btn-primary
- btn-secondary
- btn-left-add-icon-primary
- btn-left-add-icon-secondary
- btn-right-arrow-icon-primary
- btn-right-arrow-icon-secondary
After you have added a button, you can type in your button text, and you can hyperlink the button.
Contact the web team if you need assistance creating or linking to buttons: [email protected].
Archiving Content
There are two ways to archive or take temporarily take content offline. You must be a Moderator to access these features.
To hide content that you may need live at a later date, you can archive the content or set it to expire.
To Archive content, please follow the below steps:
- Click into the content type you wish to archive
- At the bottom of the page, delete the content type (this will mark the content as "Inactive")
- Click on the content type to edit
- At the bottom of the page, click on the arrow button next to "Save Changes" and select "Save as Draft"
To Set an Expiry Date content, please follow the below steps:
- Click into the content type you wish to set to expire and be hidden from the page
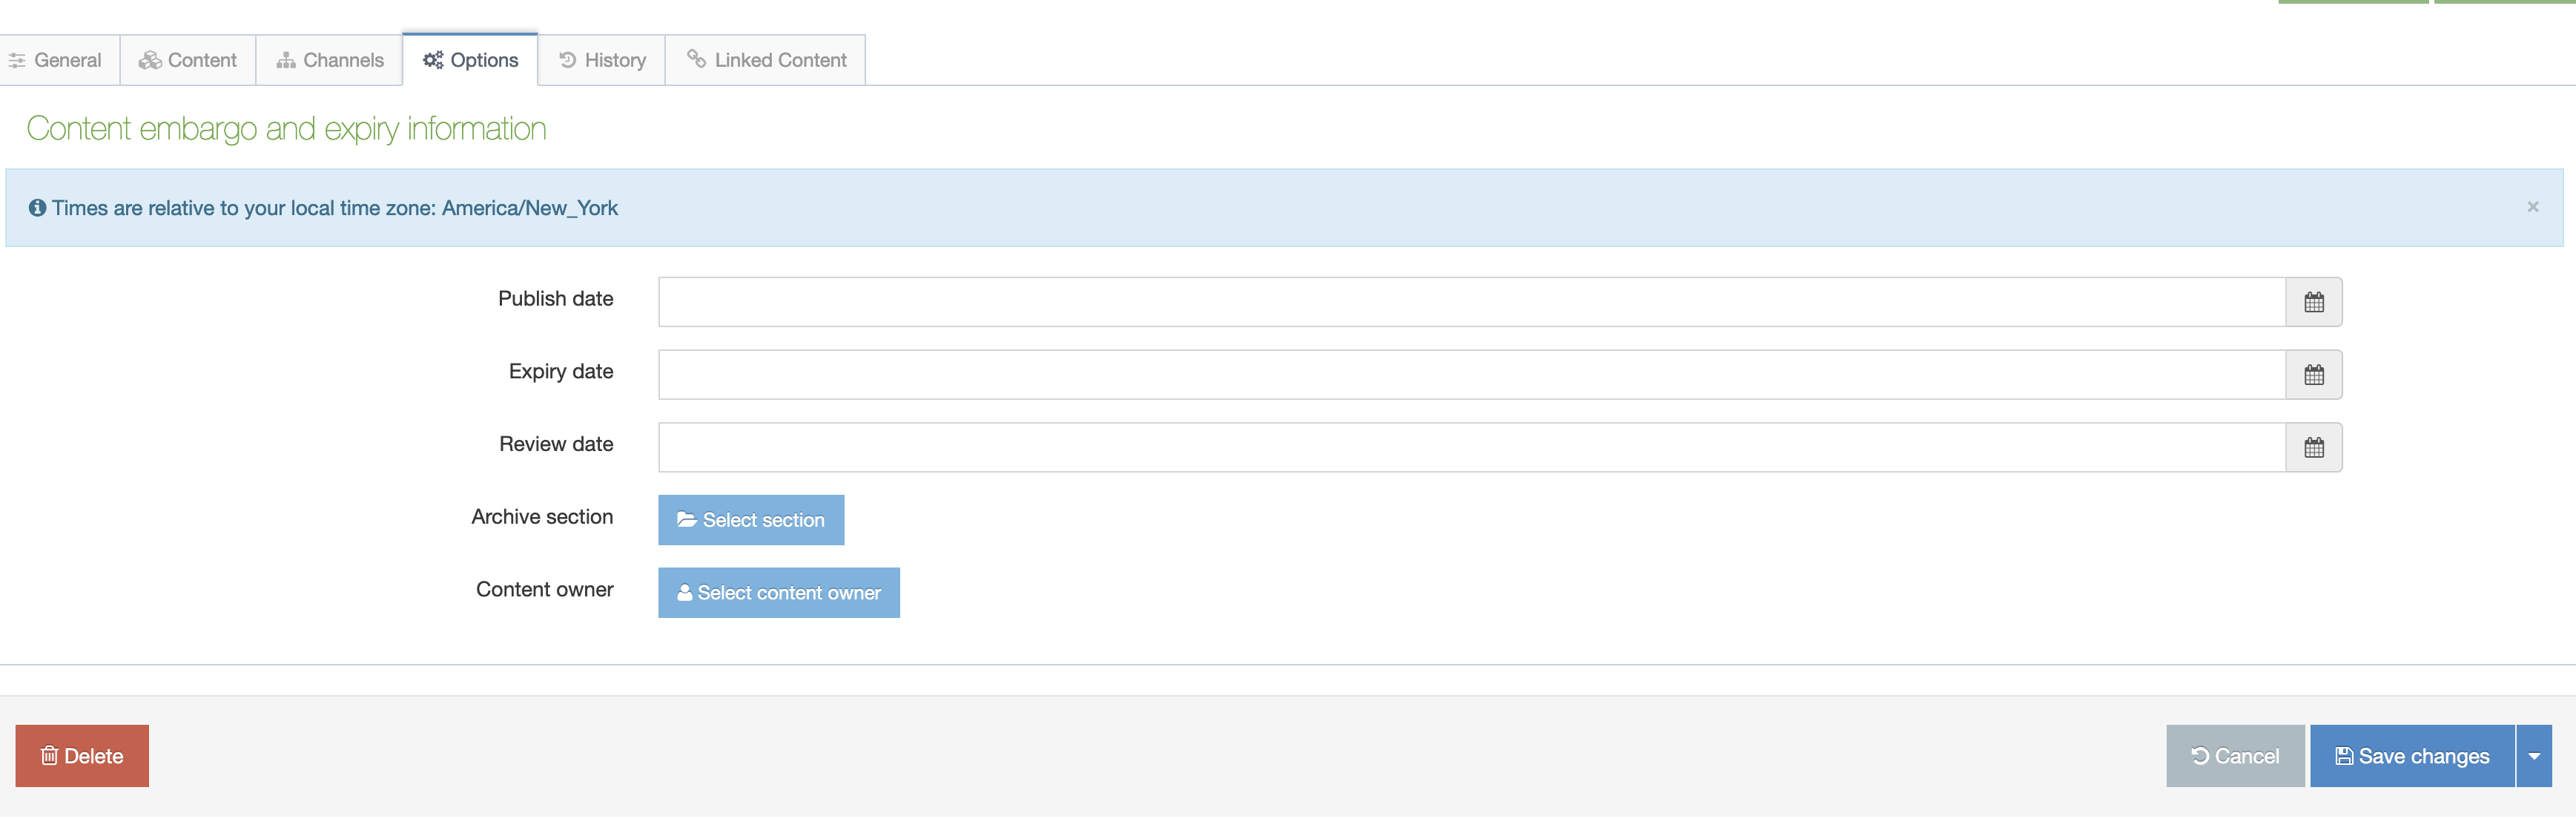
- Click the Options tab at the top
- In the Expiry date field, enter the date and time you want the content to be removed from the page
- At the bottom of the page, click on the arrow button next to "Save Changes" and select "Save as Draft"
Restoring Content
To restore archived content, you will need to change the "Inactive" content to "Pending".
To Publish Inactive content, please follow the below steps:
- Click into the content type
- Click the "Options" tab
- Select a date for "Review date"
- At the bottom of the page, click on the arrow button next to "Save Changes" and select "Save as Draft"
To Publish Expired content, please follow the below steps:
- Click into the content type
- Click the "Options" tab
- Select a date for "Publish date"
- At the bottom of the page, click on the arrow button next to "Save Changes" and select "Save as Draft"
Review Content
It is best practice to set a Review date on your pages so you get a reminder email when updates should be made. This is very helpful for content and events that should be updated on a monthly, quarterly, and annual basis.
To set a Review date, please follow the below steps:
- Click into the content type
- Click the "Options" tab
- Select a date for "Review date"
- Select a "Content Owner"
- At the bottom of the page, click on the arrow button next to "Save Changes" and select "Save and Approve"